05.06.2026
Time to read:
8
min
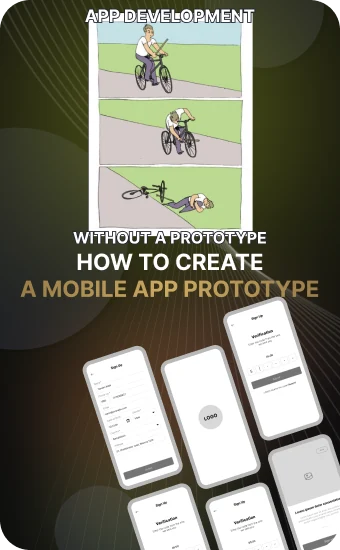
How to create a mobile app prototype
Development
Guides
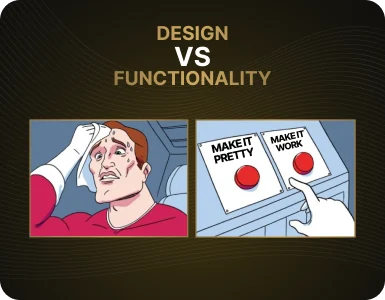
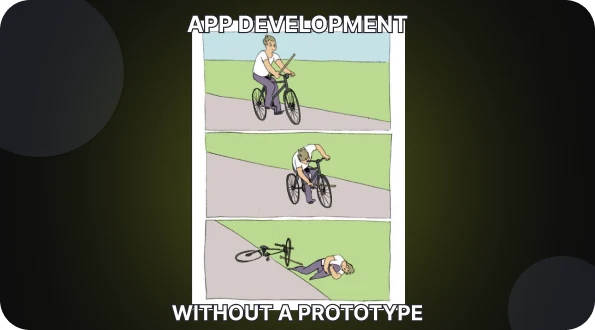
Every mobile app starts with an idea. But for that idea to take shape, it needs a clear visual representation — a prototype. This is not just a nice-looking picture, but a practical tool that helps you understand how the user will actually interact with the interface. As soon as a prototype appears, the idea stops being abstract and becomes the foundation for creating a clear, user-friendly, and in-demand product.
A prototype helps not only designers, but also developers, managers, and clients — everyone involved in the process. It becomes the meeting point of ideas, expectations, and technical reality. In this article, we’ll explain how to create an app mockup, why prototyping is important at the start of a project, what stages it includes, and which tools are best to use.

What a Mobile App Prototype Is and Why It Matters
An app prototype is a visual model of the future product’s interface. Depending on the goals, it can vary in level of detail — from a simple wireframe to a clickable version with transitions, animations, and the ability to simulate user actions. Creating a prototype makes it possible to quickly and clearly test hypotheses, validate user flows, and gather feedback before development begins.
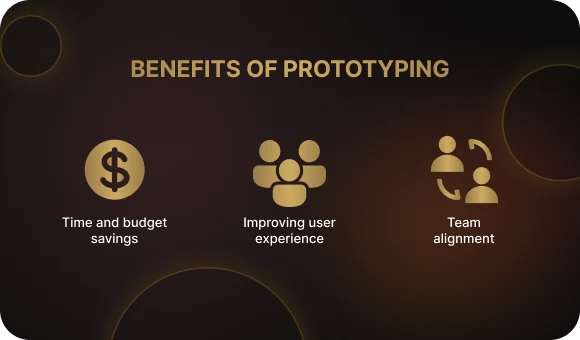
Benefits of prototyping:
- Saves time and budget. Mistakes are much cheaper to fix at the prototype stage than after the code has been written.
- Improves user experience. A prototype helps you identify in advance which interface elements are confusing, where users may get lost, and what can be simplified.
- Aligns the team. A prototype serves as a visual guide for designers, developers, and clients, minimizing misunderstandings.
Prototyping makes the product more thoughtful, logical, and focused on the needs of the end user. And the earlier you start this process, the better.
Why Prototyping Matters: Goals and Objectives
Creating a mobile app prototype is not just about “sketching screens.” It is a way to build the logic of the product, test its idea, and make sure the user can actually reach their goal. At this stage, it is important not just to design, but to think — and not only like a designer, but like a user.
1. Understanding the audience
Start with the following questions:
- Who will use the app?
- In what context?
- What tasks do they want to solve?
The answers to these questions will help define the right direction for the interface design and functionality. This is the first step in creating an app prototype that will truly be useful.
2. Defining functionality and user flows
At this stage, it is important to clearly describe what specific actions the user will be able to perform in the app. This is not just a list of features — it is a live sequence of steps that leads the user toward achieving their goal. For example, the main actions may include registration, searching for a product or service, adding it to the cart, placing an order, making a payment, and viewing purchase history or order status.
This set of steps forms the User Flow — the sequence of actions a user takes, reflecting the logic and interaction scenarios within the app. User Flow helps determine how many screens are needed, how they are connected, and which functions should be available on each one. The more accurately and thoroughly these scenarios are described, the easier it is to design a convenient and intuitive interface.
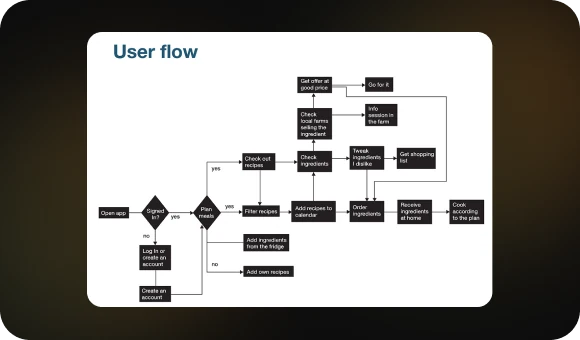
In addition, User Flow helps identify bottlenecks and potential difficulties already at the prototype stage. For example, it may reveal that a user has to go through too many steps to complete an order, or that an important button is placed in a non-intuitive location. This helps optimize the app’s logic before development starts, saving both time and budget.
In the end, a clearly structured User Flow is a roadmap for the design, development, and QA teams, making the prototyping process more meaningful and organized.
3. Clarifying interface requirements
At this stage, the key interface elements that ensure comfortable and logical user interaction are refined in detail. Navigation should be clear and predictable — the user should not have to think about how to reach the нужный экран? translate naturally: right screen or find the function they need. The placement of buttons, menus, forms, and other elements should be arranged so that they are intuitive and easy to access.
Interaction logic is not just a technical detail — it is the foundation of the user experience. How does the interface respond to user actions? What transitions and animations accompany the process? All of these details require careful review and testing.
Do not underestimate the power of a prototype — mobile app prototyping makes it possible to repeatedly test and improve the interface before a single line of code is written. It is better to test and refine a prototype ten times than to spend much more time and money reworking a finished product later. A prototype helps identify errors, unclear moments, and usability issues at an early stage, when making changes requires far fewer resources.
Careful refinement and validation of interface requirements is what makes a mobile app convenient, intuitive, and easy for developers to maintain.
How to Create an App Prototype: A Step-by-Step Breakdown
The prototyping process includes several stages. Each one is important and affects the final implementation of the project. Let’s look at them in detail.
Stage 1: Research and analysis
Before drawing even a single screen, you need to dive into analytics:
- Study your target audience
- Analyze competitors and identify their strengths and weaknesses
- Conduct interviews with potential users
- Gather data you can rely on during the design process
This will not only help you avoid common mistakes, but also save time when testing hypotheses.
Stage 2: User Flow — user scenarios
User Flow is the path the user takes to achieve their goal. For example: open the app → sign in → find a product → add it to the cart → place an order. The clearer the path, the higher the user satisfaction.
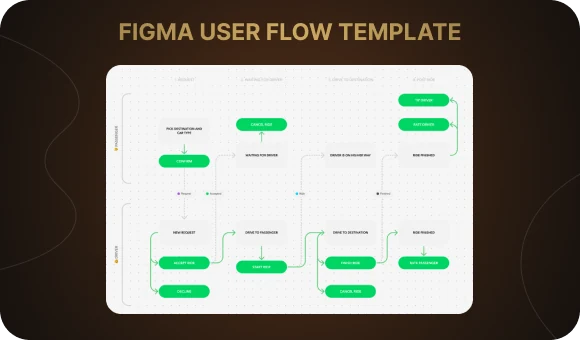
Tip: use templates from Figma or Miro to quickly visualize user scenarios. This makes collaboration and team discussion much easier.
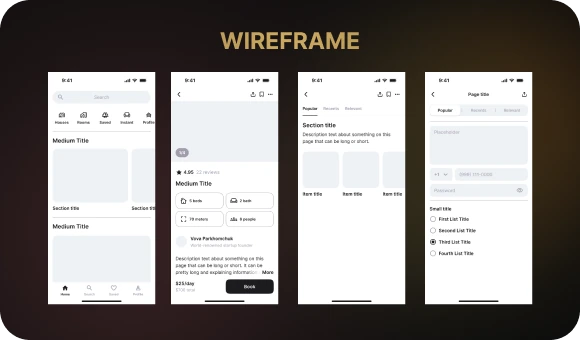
Stage 3: Wireframe — the screen framework
At this stage, a mockup is created — a simplified representation of the app screens without visual styling. The wireframe is needed in order to:
- Define the logic of element placement
- Understand which blocks are essential on each screen
- Plan the structure of the interface
If you are not sure how to create an app mockup, start by sketching the basic screens on paper or in Notion. Then transfer them into Figma.
Stage 4: Interactive prototype
Now it is time to bring the screens to life. This is done using tools such as:
- Figma — ideal for interactive prototyping
- Adobe XD — convenient for visual mockups with animation
- InVision — focused on clickable prototypes and team collaboration

Creating an interactive prototype helps evaluate how the interface works in motion, walk through interaction scenarios, and present the project to a client or the team.
Stage 5: Testing and feedback
Show the mobile app prototype to real users. Let them go through the main scenarios and complete key tasks. Ask questions such as:
- Was it clear where to tap?
- Did any difficulties arise?
- Which screen caused hesitation or confusion?
The feedback you collect is the most valuable resource for further improvement.
Stage 6: Iteration and revisions
Based on the feedback, return to the wireframe, adjust the User Flow, and optimize navigation. Prototyping is an iterative process. The more rounds of testing and refinement you go through, the better the final product will be.

Tools for Creating Mobile App Prototypes
You do not have to be a design expert to create an app mockup. The main thing is choosing the right tool. Here is a quick overview:
- Figma — a cloud-based service with support for team collaboration. Suitable for both design and prototyping. It has a free version and a huge number of templates.
- Adobe XD — intuitive interface, fast performance, and many plugins.
- Sketch — ideal for macOS users. Integrates well with other tools.
- InVision — convenient for presenting prototypes, discussing them, and collecting comments.
You can use any of these tools — it all depends on the project, the team, and personal preferences. Figma is often chosen as a universal solution because it combines design, interactivity, and templates to speed up the process.
Tips for Effective Prototyping
To stay on track, follow these principles:
- Start simple. Begin on paper and let the idea take shape through rough sketches.

- Do not be afraid to delete. If something does not work, remove it.
- Think like a user. You are not the main character — the person opening the app on the train or while rushing somewhere is.
- Test hypotheses. Run small tests. It is better to spend an hour on testing than a week fixing mistakes.
- Use templates. They help you get started faster and reduce the risk of missing important elements.
- Work as a team. A prototype becomes better when several people think it through together.
Conclusion: The Prototype as the Foundation of a Successful App
Creating an app prototype is one of the most important stages of development. It allows you to gather all ideas into a single system, see the product before it is implemented, and make sure it meets the needs of the target audience. If you want to build a mobile app that truly works, start with a prototype.
Every app begins with an idea, but only a high-quality prototype turns that idea into a product. The Beetrail team knows how to create a prototype that perfectly reflects your vision and meets user expectations.
Our team offers an individual approach — from idea analysis to an interactive prototype. Dreaming of an app that will win over its audience? Contact us, and we will develop a solution created specifically for you.
What a Mobile App Prototype Is and Why It Matters
An app prototype is a visual model of the future product’s interface. Depending on the goals, it can vary in level of detail — from a simple wireframe to a clickable version with transitions, animations, and the ability to simulate user actions. Creating a prototype makes it possible to quickly and clearly test hypotheses, validate user flows, and gather feedback before development begins.
Benefits of prototyping:
- Saves time and budget. Mistakes are much cheaper to fix at the prototype stage than after the code has been written.
- Improves user experience. A prototype helps you identify in advance which interface elements are confusing, where users may get lost, and what can be simplified.
- Aligns the team. A prototype serves as a visual guide for designers, developers, and clients, minimizing misunderstandings.
Prototyping makes the product more thoughtful, logical, and focused on the needs of the end user. And the earlier you start this process, the better.
Why Prototyping Matters: Goals and Objectives
Creating a mobile app prototype is not just about “sketching screens.” It is a way to build the logic of the product, test its idea, and make sure the user can actually reach their goal. At this stage, it is important not just to design, but to think — and not only like a designer, but like a user.
1. Understanding the audience
Start with the following questions:
- Who will use the app?
- In what context?
- What tasks do they want to solve?
The answers to these questions will help define the right direction for the interface design and functionality. This is the first step in creating an app prototype that will truly be useful.
2. Defining functionality and user flows
At this stage, it is important to clearly describe what specific actions the user will be able to perform in the app. This is not just a list of features — it is a live sequence of steps that leads the user toward achieving their goal. For example, the main actions may include registration, searching for a product or service, adding it to the cart, placing an order, making a payment, and viewing purchase history or order status.
This set of steps forms the User Flow — the sequence of actions a user takes, reflecting the logic and interaction scenarios within the app. User Flow helps determine how many screens are needed, how they are connected, and which functions should be available on each one. The more accurately and thoroughly these scenarios are described, the easier it is to design a convenient and intuitive interface.
In addition, User Flow helps identify bottlenecks and potential difficulties already at the prototype stage. For example, it may reveal that a user has to go through too many steps to complete an order, or that an important button is placed in a non-intuitive location. This helps optimize the app’s logic before development starts, saving both time and budget.
In the end, a clearly structured User Flow is a roadmap for the design, development, and QA teams, making the prototyping process more meaningful and organized.
3. Clarifying interface requirements
At this stage, the key interface elements that ensure comfortable and logical user interaction are refined in detail. Navigation should be clear and predictable — the user should not have to think about how to reach the нужный экран? translate naturally: right screen or find the function they need. The placement of buttons, menus, forms, and other elements should be arranged so that they are intuitive and easy to access.
Interaction logic is not just a technical detail — it is the foundation of the user experience. How does the interface respond to user actions? What transitions and animations accompany the process? All of these details require careful review and testing.
Do not underestimate the power of a prototype — mobile app prototyping makes it possible to repeatedly test and improve the interface before a single line of code is written. It is better to test and refine a prototype ten times than to spend much more time and money reworking a finished product later. A prototype helps identify errors, unclear moments, and usability issues at an early stage, when making changes requires far fewer resources.
Careful refinement and validation of interface requirements is what makes a mobile app convenient, intuitive, and easy for developers to maintain.
How to Create an App Prototype: A Step-by-Step Breakdown
The prototyping process includes several stages. Each one is important and affects the final implementation of the project. Let’s look at them in detail.
Stage 1: Research and analysis
Before drawing even a single screen, you need to dive into analytics:
- Study your target audience
- Analyze competitors and identify their strengths and weaknesses
- Conduct interviews with potential users
- Gather data you can rely on during the design process
This will not only help you avoid common mistakes, but also save time when testing hypotheses.
Stage 2: User Flow — user scenarios
User Flow is the path the user takes to achieve their goal. For example: open the app → sign in → find a product → add it to the cart → place an order. The clearer the path, the higher the user satisfaction.
Tip: use templates from Figma or Miro to quickly visualize user scenarios. This makes collaboration and team discussion much easier.
Stage 3: Wireframe — the screen framework
At this stage, a mockup is created — a simplified representation of the app screens without visual styling. The wireframe is needed in order to:
- Define the logic of element placement
- Understand which blocks are essential on each screen
- Plan the structure of the interface
If you are not sure how to create an app mockup, start by sketching the basic screens on paper or in Notion. Then transfer them into Figma.
Stage 4: Interactive prototype
Now it is time to bring the screens to life. This is done using tools such as:
- Figma — ideal for interactive prototyping
- Adobe XD — convenient for visual mockups with animation
- InVision — focused on clickable prototypes and team collaboration
Creating an interactive prototype helps evaluate how the interface works in motion, walk through interaction scenarios, and present the project to a client or the team.
Stage 5: Testing and feedback
Show the mobile app prototype to real users. Let them go through the main scenarios and complete key tasks. Ask questions such as:
- Was it clear where to tap?
- Did any difficulties arise?
- Which screen caused hesitation or confusion?
The feedback you collect is the most valuable resource for further improvement.
Stage 6: Iteration and revisions
Based on the feedback, return to the wireframe, adjust the User Flow, and optimize navigation. Prototyping is an iterative process. The more rounds of testing and refinement you go through, the better the final product will be.
Tools for Creating Mobile App Prototypes
You do not have to be a design expert to create an app mockup. The main thing is choosing the right tool. Here is a quick overview:
- Figma — a cloud-based service with support for team collaboration. Suitable for both design and prototyping. It has a free version and a huge number of templates.
- Adobe XD — intuitive interface, fast performance, and many plugins.
- Sketch — ideal for macOS users. Integrates well with other tools.
- InVision — convenient for presenting prototypes, discussing them, and collecting comments.
You can use any of these tools — it all depends on the project, the team, and personal preferences. Figma is often chosen as a universal solution because it combines design, interactivity, and templates to speed up the process.
Tips for Effective Prototyping
To stay on track, follow these principles:
- Start simple. Begin on paper and let the idea take shape through rough sketches.
- Do not be afraid to delete. If something does not work, remove it.
- Think like a user. You are not the main character — the person opening the app on the train or while rushing somewhere is.
- Test hypotheses. Run small tests. It is better to spend an hour on testing than a week fixing mistakes.
- Use templates. They help you get started faster and reduce the risk of missing important elements.
- Work as a team. A prototype becomes better when several people think it through together.
Conclusion: The Prototype as the Foundation of a Successful App
Creating an app prototype is one of the most important stages of development. It allows you to gather all ideas into a single system, see the product before it is implemented, and make sure it meets the needs of the target audience. If you want to build a mobile app that truly works, start with a prototype.
Every app begins with an idea, but only a high-quality prototype turns that idea into a product. The Beetrail team knows how to create a prototype that perfectly reflects your vision and meets user expectations.
Our team offers an individual approach — from idea analysis to an interactive prototype. Dreaming of an app that will win over its audience? Contact us, and we will develop a solution created specifically for you.